We’re almost done with the contract work for our farmhouse renovation! That doesn’t mean that we are done with all the work, but it’s a great leap forward towards finishing it out. My husband, Michael, has been building his specialty tool collection in the garage over the last 8 years! They’ll all come in handy for our upcoming projects. My handyman skills are small, but helpful. I like sanding and painting. Michael doesn’t like painting and he “tolerates” sanding…The Lord paired us well!
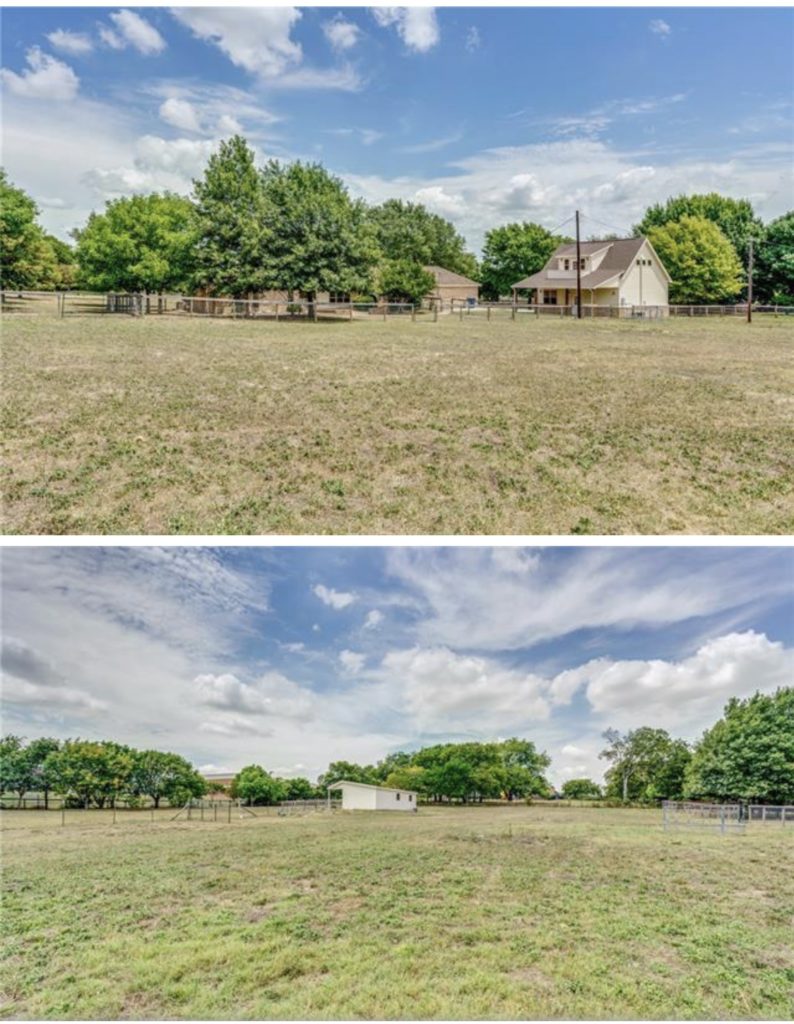
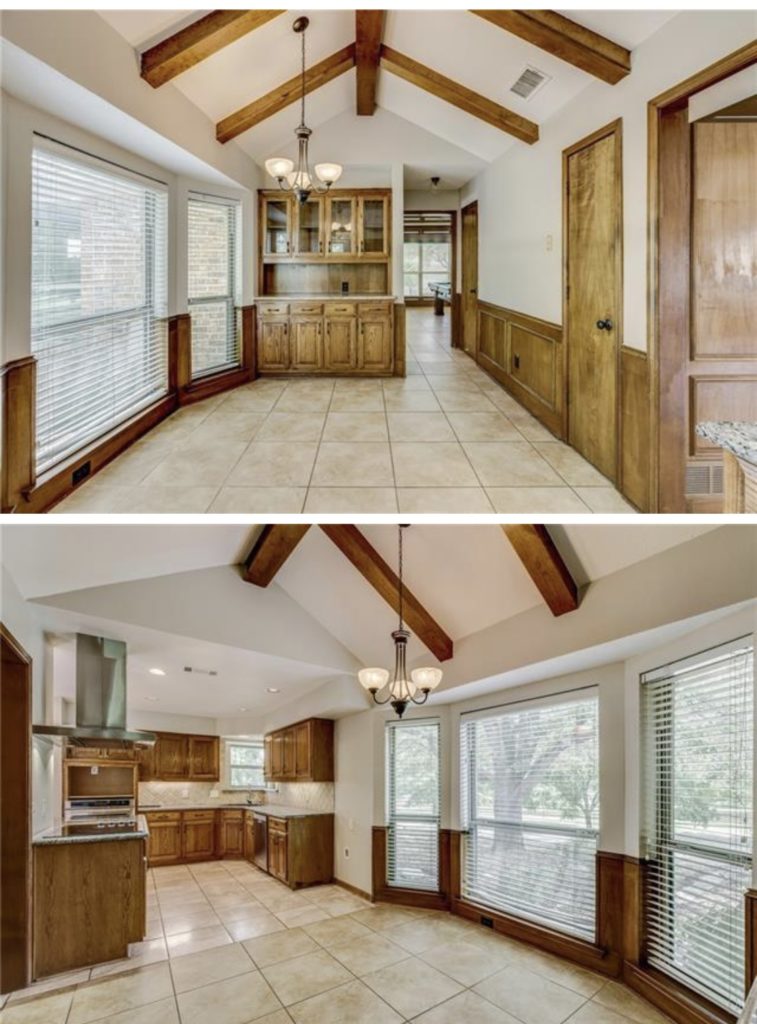
More “Before” images can be found here.

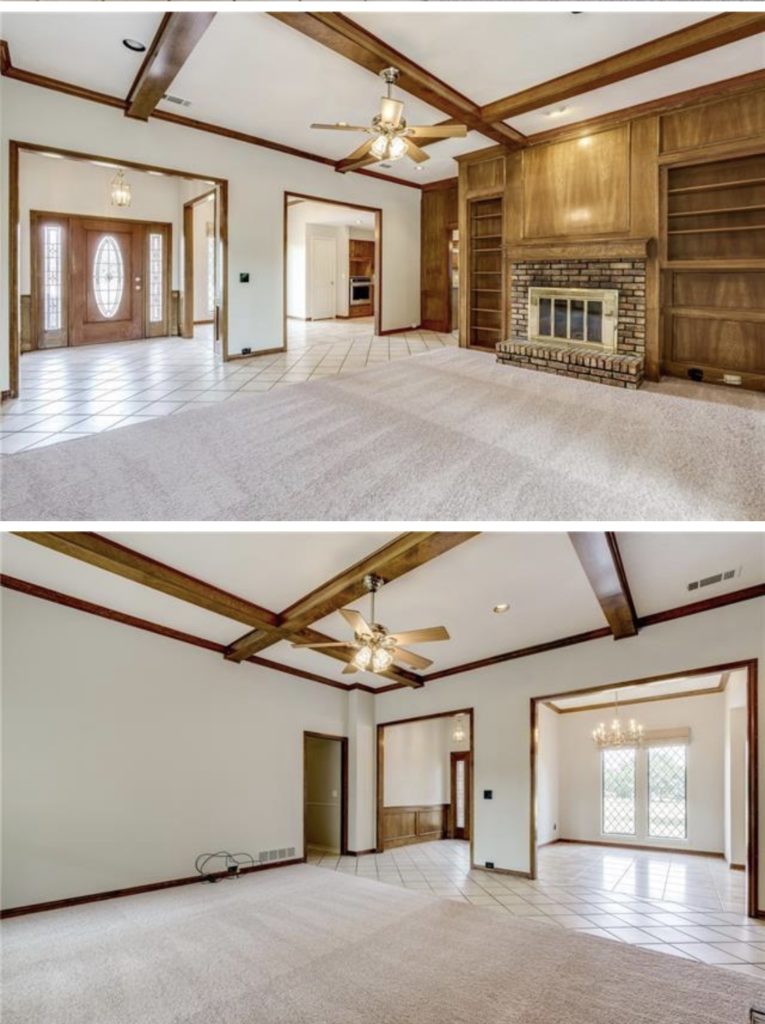
We were immediately drawn to the tall ceilings and the awesome beams currently installed in the living room and the breakfast nook. In the first stage of renovations, we hired an engineer to determine if removing the inner walls of the kitchen area were a possibility. Luckily, they were! A 22ft steel beam was installed as well as a 10 ft cross beam. The 22ft beam runs from the foyer all the way to the outer kitchen wall. We also had to have those electrical cords hanging down rerouted in the process.
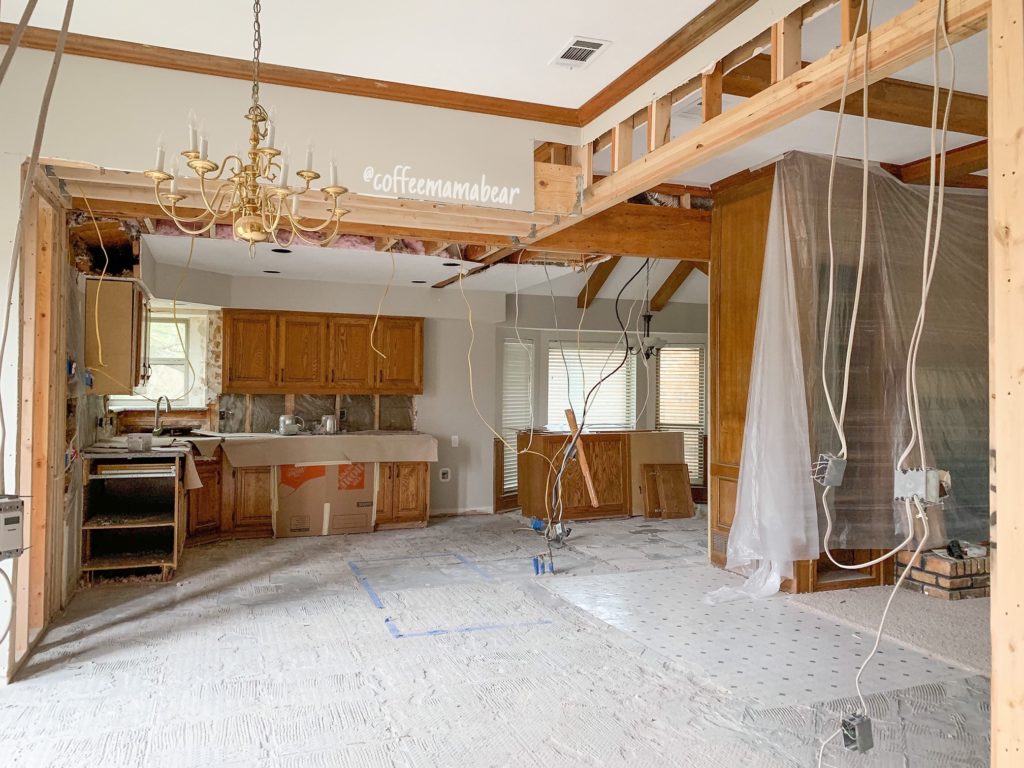
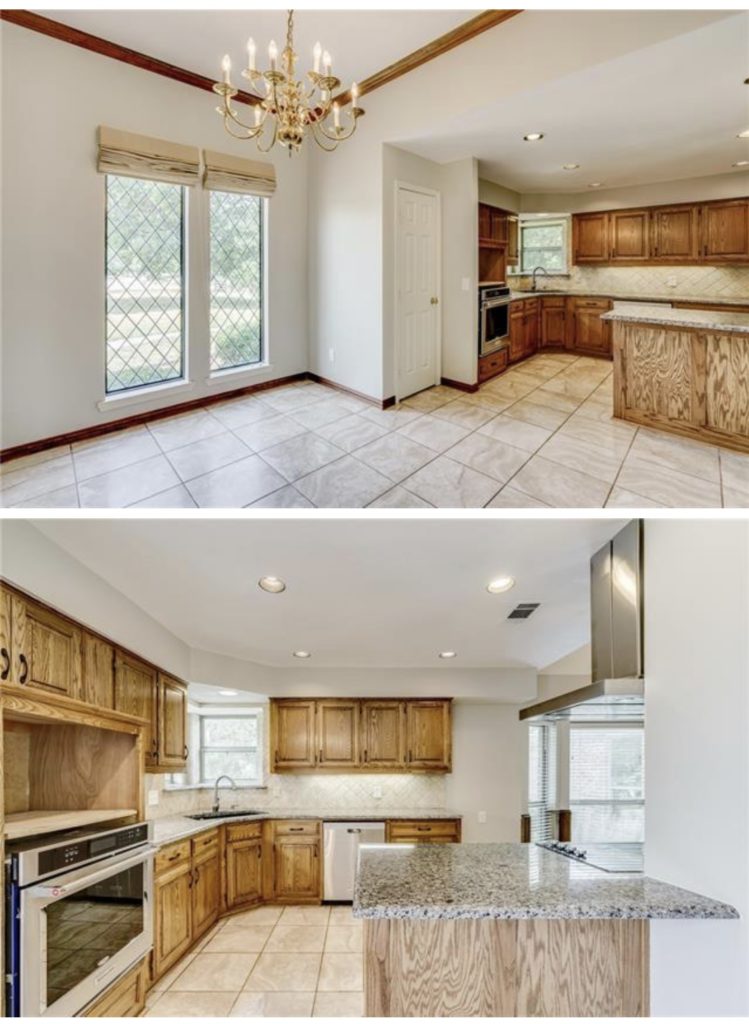
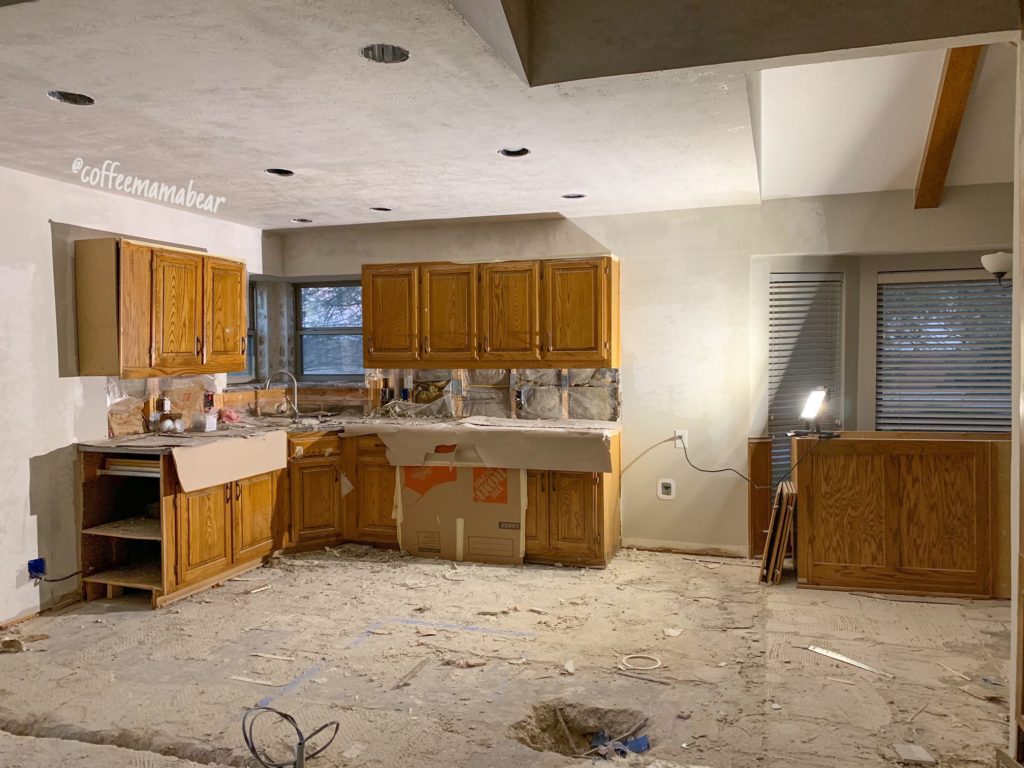
There were two surprises that happened during this reno stage. We found out that during a previous renovation they had capped off some existing plumbing lines from when the design was a galley style kitchen. They were still above ground, so we had to hire a plumber who spent two days drilling and fixing the issue before we could move on to flooring installation. The other surprise was a happy one in that the fur-downs/soffits above the kitchen cabinets could be removed! We did not have the option to raise the ceiling in the kitchen area because of the placement of the headers, so this was the next best thing in order to make the kitchen appear more open.
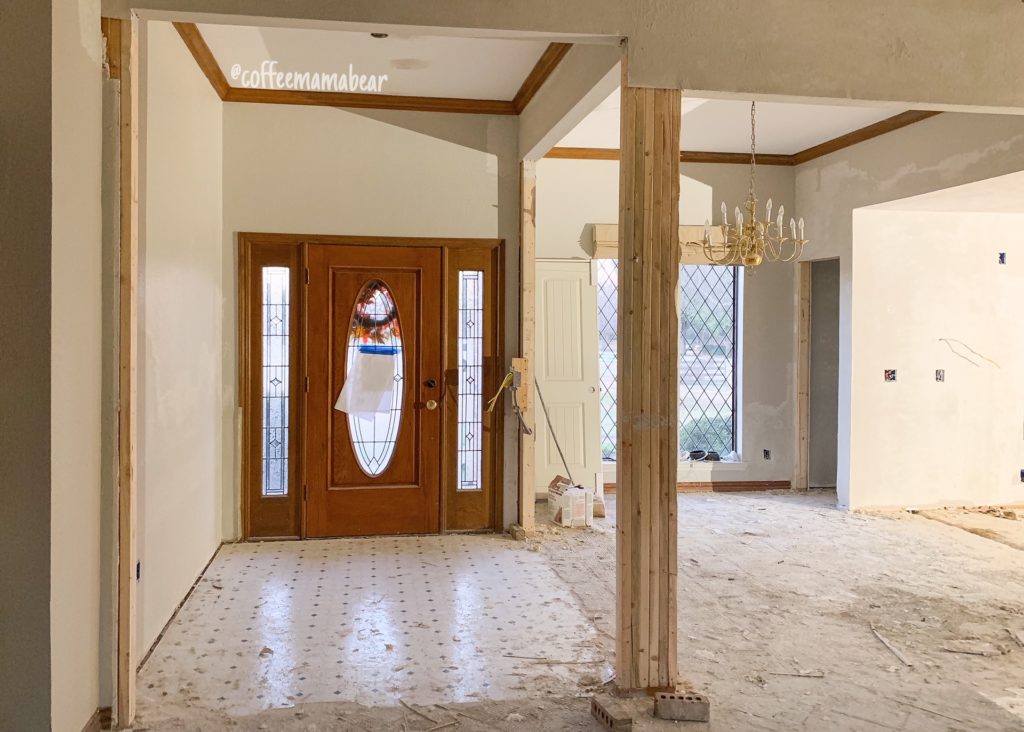
Besides our kitchen renovation, we wanted to update and add character to the foyer area. The paneling was removed from the main wall. We also decided to add brick columns and two arches to make it a large design element. A lot of thought went into the column size, what worked for the space, where electrical would be located, and that was all before we even selected the brick!
It took a few weeks to select our targeted look for the design details. We scoured previous decor magazines that I had collected over the years, like Southern Living, and we browsed Pinterest too. We pulled together elements that leaned on farmhouse and french country styles. Our main desire when picking out the details were items that encourage comfort, not chaos. As we move forward in selecting furniture, in the upcoming months, we’ll be sticking with those themes as well!
Our flooring selection, which was the design detail we chose first, we went with “Walnut Brook CW98” from American Olean‘s Creekwood Collection. We made sure to choose a wood-look tile made out of porcelain, as ceramic has a tendency to chip easily. Our kids and the dog are a rough and tumble bunch, so we needed to choose a flooring that could handle them!
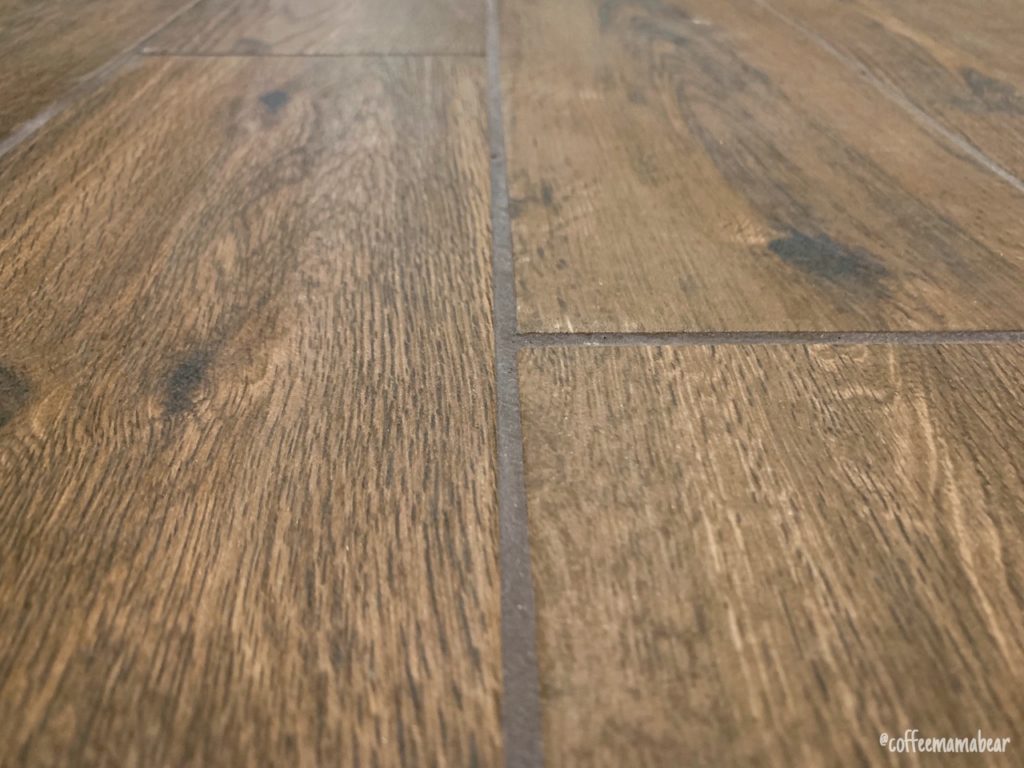
If you ever want to go with wood-look tile, I have this important tip for you when selecting grout color. Find the grout that matches your selection exactly and then choose the color that is one step darker. This will provide a more shadowy look and help provide more realism to the wood-look tile upon install. We went with Mapei‘s “Truffle” grout color.
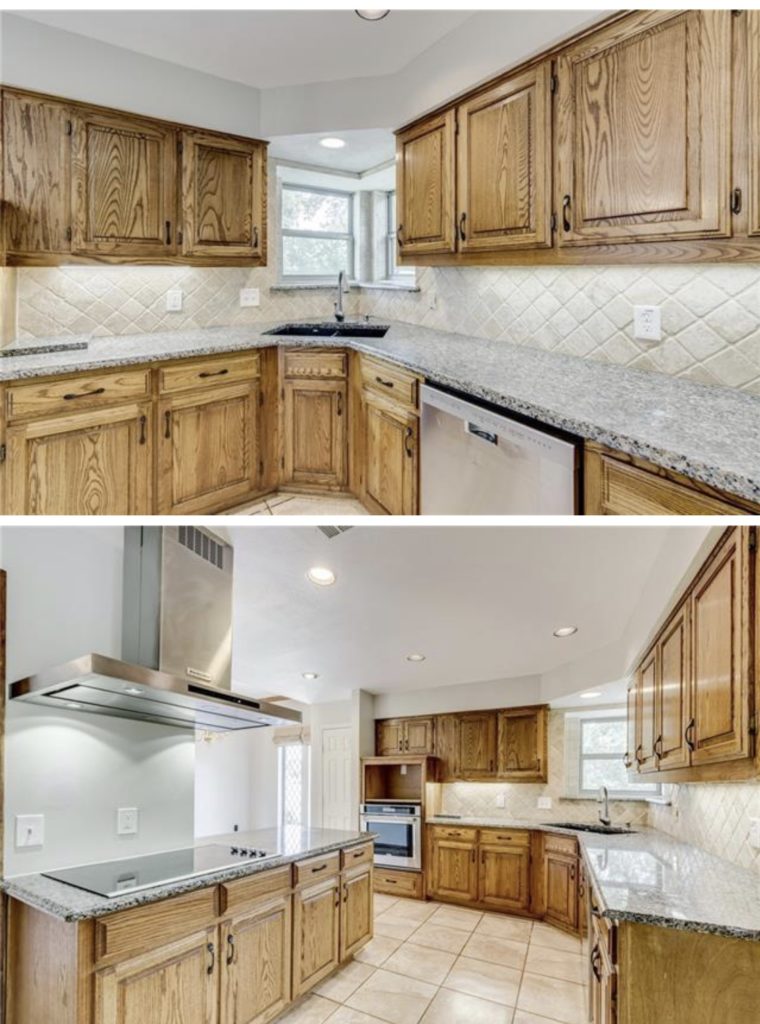
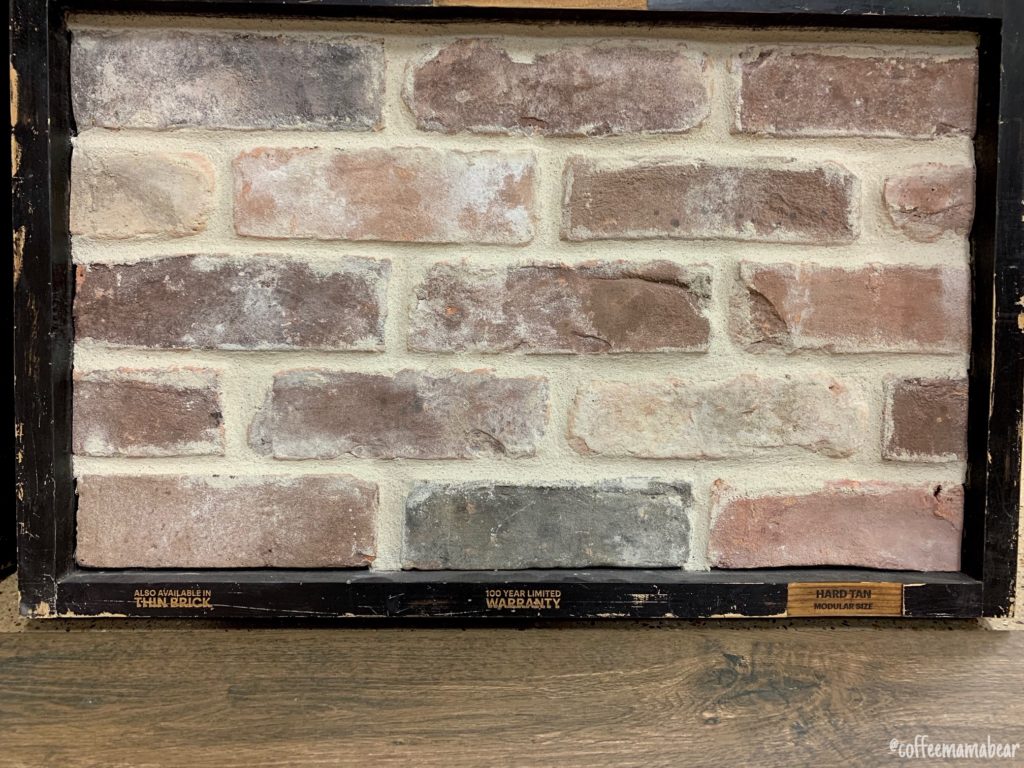
If you hate making decisions, picking out brick will be your worst nightmare! We had a great idea of what we wanted, but it still took the entire hour allotted to comb through the giant warehouse of a showroom to narrow it down. We went with “Old Hard Tan” from Old Texas Brick. I also carried a piece of our flooring with us the entire day as we were off to pick out the kitchen island slab after lunch. I would highly recommend bringing any tile, flooring, or other textile samples with you when going through the selection process!
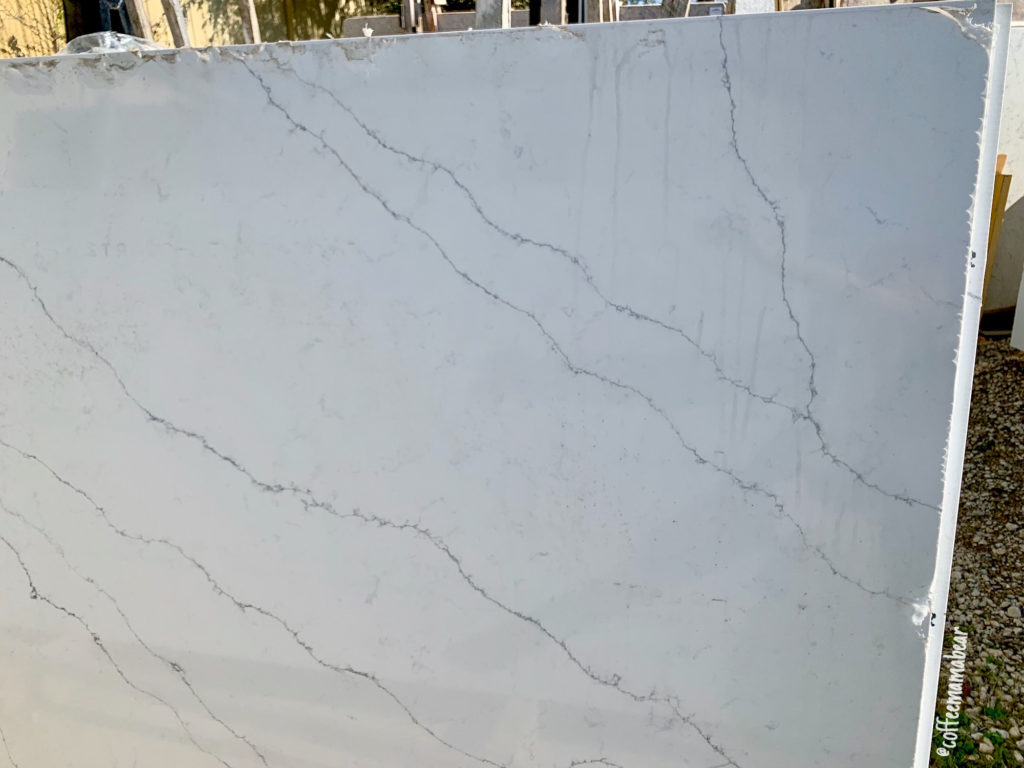
The slab yard was so fun to visit! The guy in charge showed us all the options available for white slabs with veining. I made a selection and they kindly brought a truck over to turn it around so I could see the whole piece. I loved this veining and the color worked well with our flooring sample. We chose “Bianco Venatino Quartz Polished” from Everest Stone.
We’ll get in to more of the nitty gritty kitchen selections for paint, cabinet color, and exactly what we’re doing with the paneling left in the breakfast nook in my next post! We’ve got a lot of detail work ahead of us. Until next time, keep your chin up and may your coffee cup be full!
-Erin aka Coffee Mama Bear
Please feel free to email me with any questions or comments: erin@coffeemamabear.com
For more coffee fun and connection follow me on Instagram!